출처: http://tecadmin.net/setup-loganalyzer-with-rsyslog-and-mysql/
This article is second part of the article Setup Rsyslog with MySQL and LogAnalyzer on CentOS/RHEL systems. In the first part we have integrated Rsyslog with MySQL database server, and all the logs are now saving in database. For recalling below is few configuration details which we used in part-1 to setup it.
Rsyslog MySQL Database: Syslog
Rsyslog MySQL Username: rsyslog
Rsyslog MySQL Password: MYSQLPASSWORD
Lets start the setup of LogAnalyzer on your Linux system with Rsyslog database using following steps.
Step 1: Download and Extract LogAnalyzer
Download the LogAnalyzer latest version from its official download site or use following command to download 3.6.5 ( Current latest version ) version and extract it.
# wget http://download.adiscon.com/loganalyzer/loganalyzer-3.6.5.tar.gz
# tar xzf loganalyzer-3.6.5.tar.gz
After extracting copy the required files to web server default document root as below.
# mv loganalyzer-3.6.5/src /var/www/html/loganalyzer
Step 2: Create Config File
Now create a blank configuration file named config.php in loganalyzer directory and setup write permission to apache user.
# cd /var/www/html/loganalyzer
# touch config.php
# chown apache:apache config.php
# chmod 777 config.php
Step 3: Start Web Installer
After completing above steps open following url in your favorite web browser to start LogAnalyzer web installer.
http://tecadmin.net/loganalyzer/intall.php
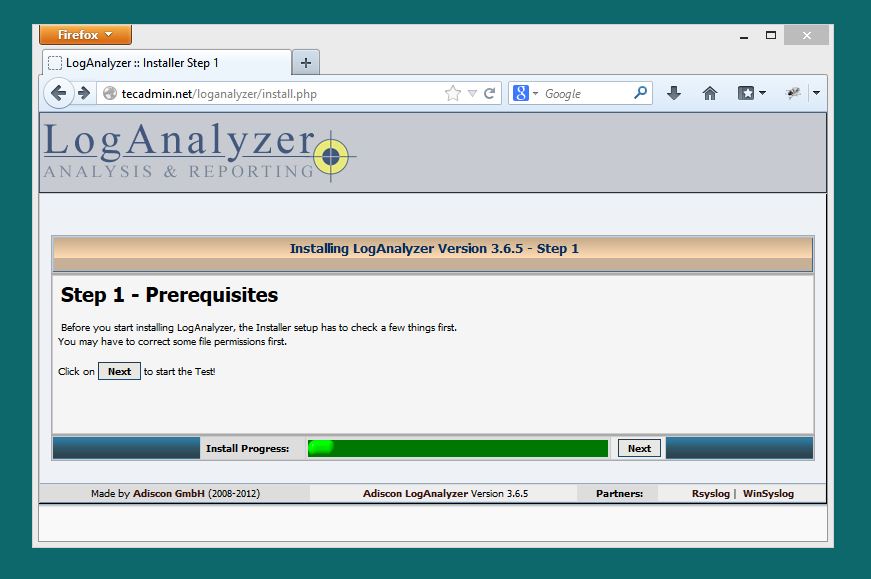
Now follow the web installer steps as per below given screen shots.
Step 3.1: Just click Next.
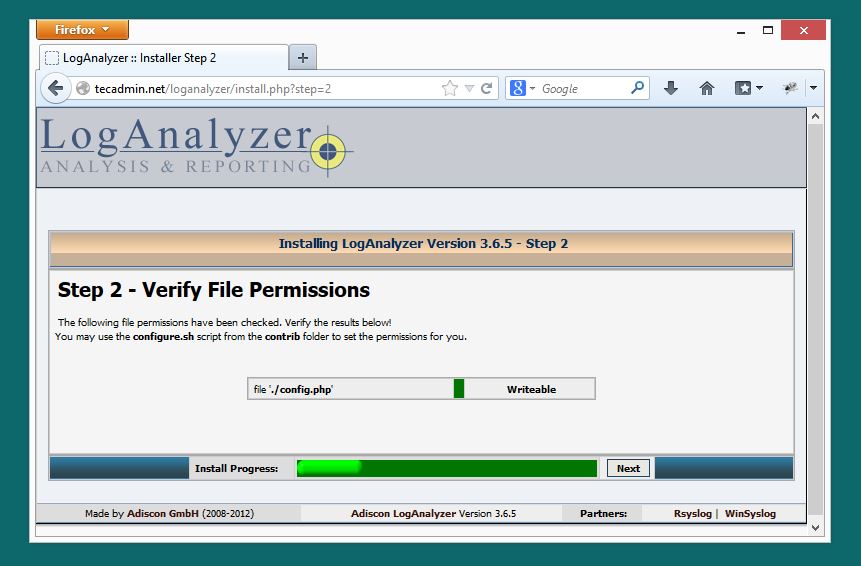
Step 3.2: Make sure config.php is writable and click Next.
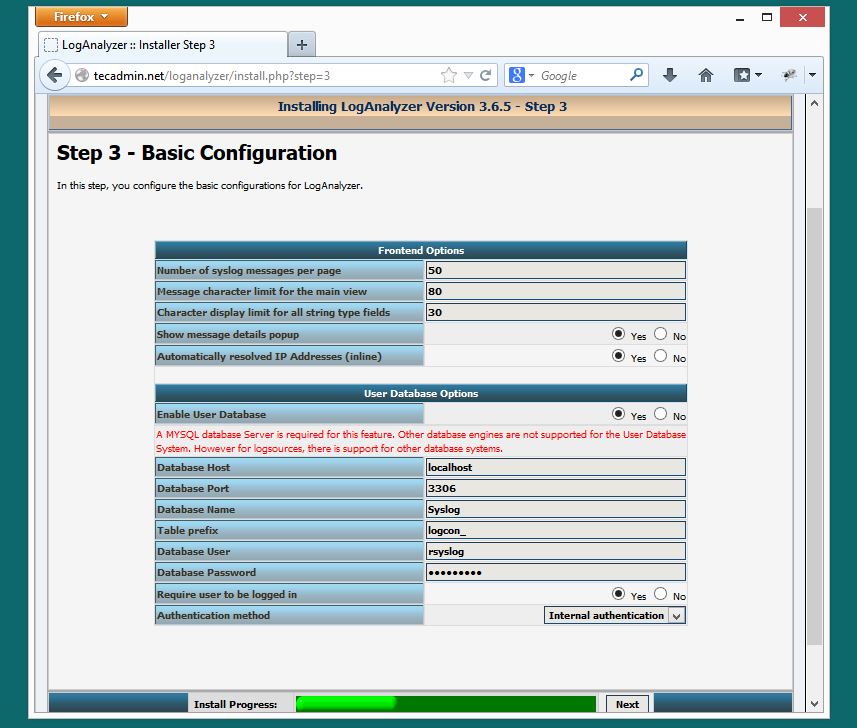
Step 3.3: Fill the database details for loganalyzer, we can also use same database used for Rsyslog and click Next.
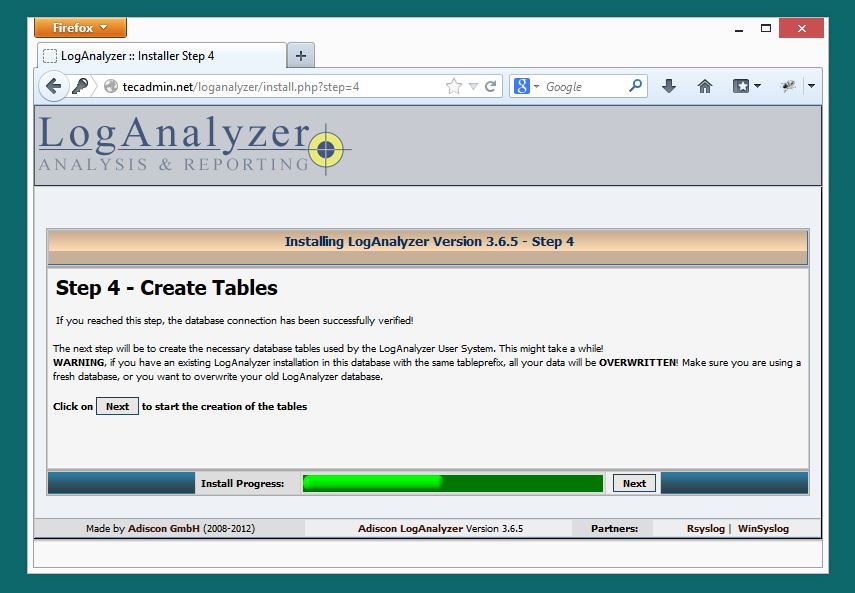
Step 3.4: In this step installer will create database table, if tables already found, you will get an warning of data overwritten. We just need to click Next.
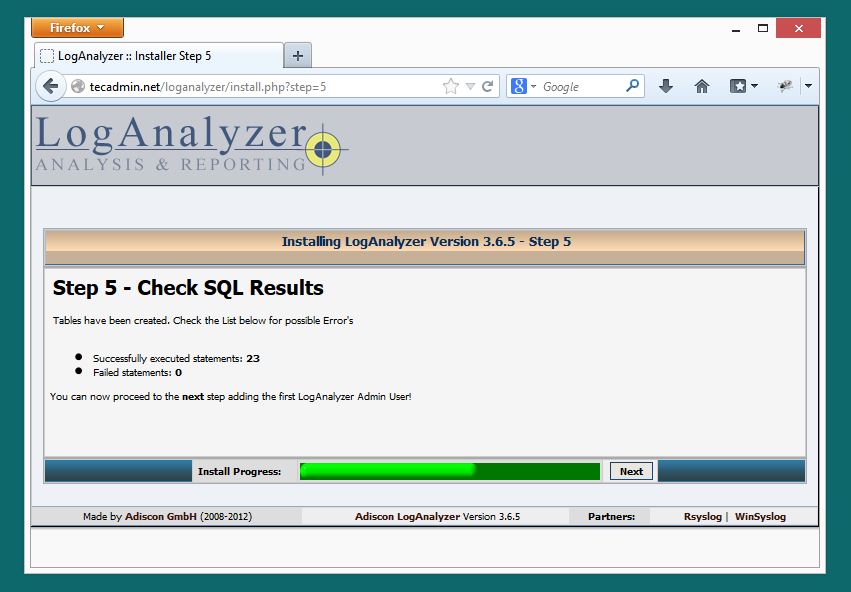
Step 3.5: This screen will show the result of table creation’s. Just click Next
Step 3.6: Create an Administrator account and click Next.

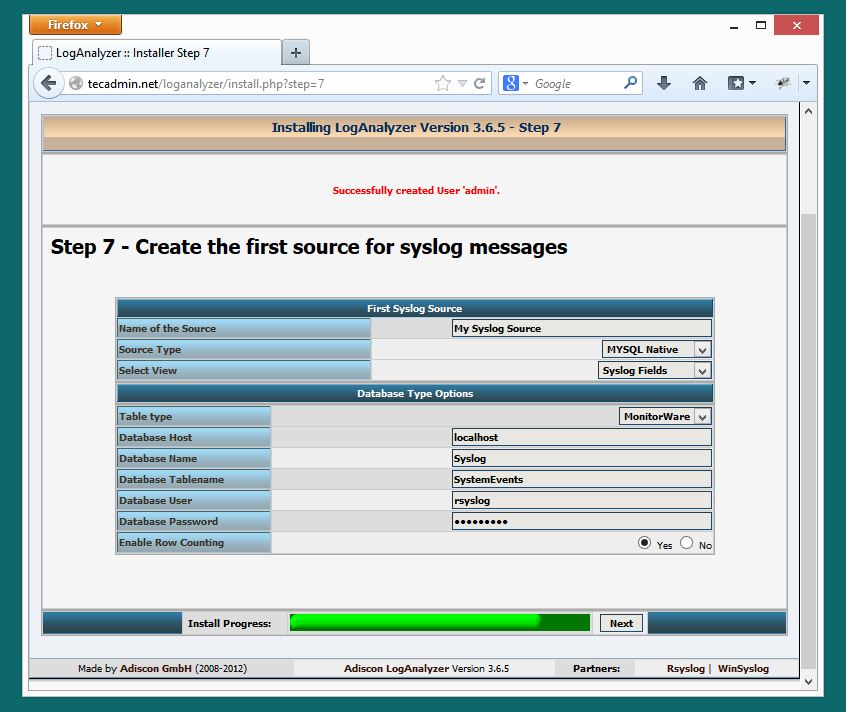
Step 3.7: Fill the Rsyslog database details and click Next.
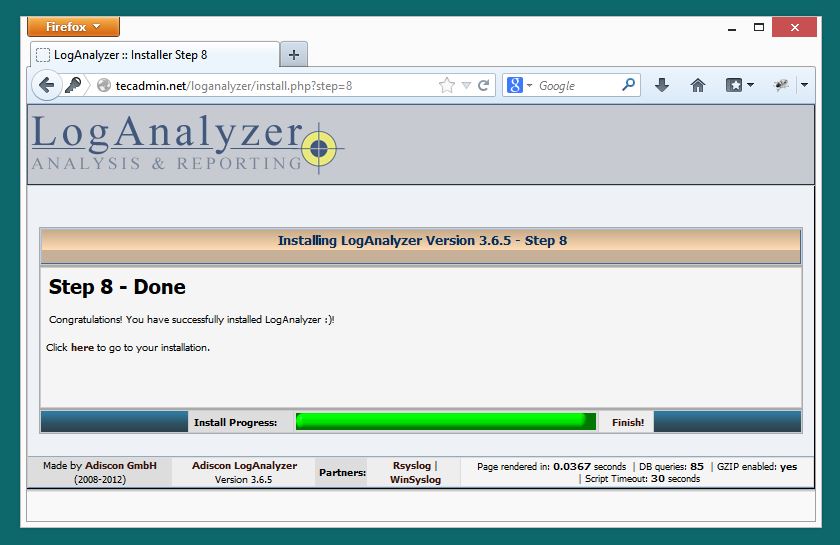
Step 3.8: LogAnalyzer installation has been completed. We just need to click Finish.
Step 3.9: Login to LogAnalyzer using Administrator credentials created in Step 3.6.

Congratulation’s! on successful configuration of LogAnalyzer with Rsyslog MySQL database. Read other article to configure Rsyslog to collect logs on central server. So we can monitor all server logs at on place using LogAnalyzer.


